In this chapter, the functions of emaVR with the corresponding key assignments are explained.
Ways of movement
emaVR includes two ways of movement: teleportation and walking. Teleporting is recommended for moving quickly through the scenario, while running is for fine-tuning your position.
Teleportation
•Press trigger on the left controller (7)/(15a) once with index finger
•Aim the beam at a valid position
•Press the trigger again to teleport to the targeted location
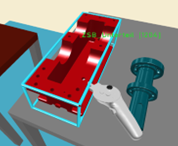
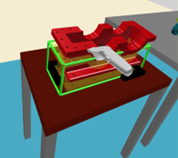
•Red position indicator: to avoid collisions with objects, teleportation to the selected position is not possible
•Cancel teleportation: aim the beam up and press the trigger
|
|
Figure 9: Valid teleportation target |
Figure 10: Invalid teleportation target |
Walking
•Depending on the type of controller used, press the track pad (2a) or the joystick (11a) of the left controller:
•Click up: move forward
•Click down: move backward
•Click right: turn right
•Click left: turn left
Grabbing and moving of objects
In order to grab and move objects, they must be touched with any controller. A blue or orange frame around the object visualizes the touch.

Figure 11: Object selection
•Press the grip button (8)/(14) and keep it pressed
•As long as the grip button is pressed, the object is in the hand
•Move the grabbed object to the target location and release the grip button to place the object

Figure 12: Snapping of objects
Gravity mode is enabled to aid in positioning. Objects "snap" into pre-determined reference positions that can be created using the assembly template. Such reference positions are indicated by a green animation and border when the object is close.
Changes made can be undone by holding the menu button (1) or X button (10) on the left controller.
The calculation of controller collisions can be deactivated and reactivated by pressing the right trigger (7b) / the B button (16). The controllers are displayed transparently in this mode and the grabbing of objects is not possible.
The gravity function, which is activated by default, can be deactivated and reactivated if necessary by pressing the system button on the right controller (3) / the Y button (9).
Locked objects cannot be moved in VR. Structure locks are adopted analogously to the desktop application.
Playback controls
To play the simulation, the track pad (2b) or the joystick (11b) is required.
•Playback can be started by clicking on the middle / the right side of the track pad / joystick.
•Playback can be paused by clicking on the middle / the left side of the track pad / joystick.
•Clicking on the right side of the track pad / joystick increases playback speed.
•Clicking on the left side of the track pad / joystick rewinds the simulation or slows down the playback speed if it was previously increased.
•A click on the menu button (1) or app button (17) shows or hides the status bar.
Key assignment for SteamVR
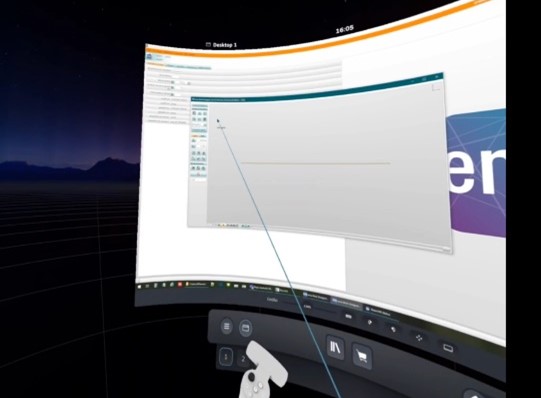
Regardless of the key assignment for ema, the virtual desktop (i.e. a 2D projection of the computer screens) can be displayed via the menu or system button (left and, if necessary, right controller). This makes it possible to operate the software (load scenario, re-simulate, view results) without the corresponding VR control elements.

Figure 13: Viewing ema via virtual desktop