The submenu of File contains the buttons New project, Last projects used, Load project, Save project, Save project as and Cancel.
The command New project creates a new ema project and switches to the tab Simulation project for the entry of the master data (see chapter User interface / Menu bar / Tab "Simulation project").

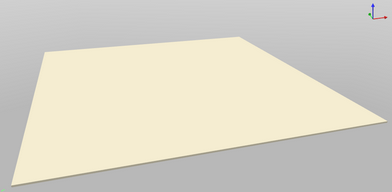
Figure 15: Standard - new project
The following is inserted by default:
▪A floor 10 m x 10 m (declared floor object)
▪A light source*
▪A camera*
* The objects are hidden by default, but can be shown if required using the option Show helper objects on UI (see chapter User interface / Menu bar / Options / Settings / User interface).
The command Last projects used opens an overview of the last projects processed.
The storage and loading of ema simulation projects is file-based. Using the corresponding commands in the menu File, project files (*.ema) can be saved and reloaded.
The corresponding project file must be selected via Load project. Alternatively, the ema file can be dragged and dropped into the ema window. Drag the ema file by clicking the file (left click), move it to an active ema window and then drop it by releasing the mouse button to load the file. The required geometry data is stored in a directory with the designation emaGeometry in relation to the project file. If the project to be loaded had been previously simulated in ema, then the corresponding motion data is available in ema. This implies immediately after loading the project the simulation can be played without actually simulating the project.
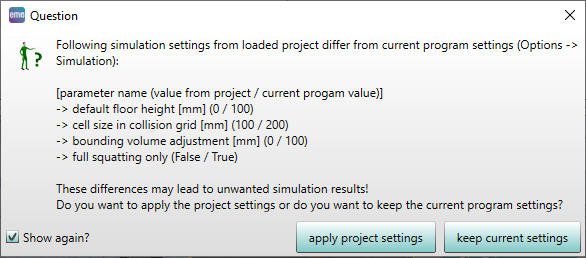
▪The simulation settings are stored in the ema project files. Every time a project is loaded, it will be checked if the settings of the project file are matching the program settings (see chapter User Interface / Menu bar / Options / Settings / Simulation). If this is not the case, all deviations will be shown in a corresponding dialog window (see figure Dialog window). The user can now decide, if he wants to follow the program settings, or if the program settings should be overwritten by the project settings. |

Figure 16: Dialog window
Save project as releases to the request of a target directory and a file name. The new project file is now stored in the root of the selected directory. An emaGeometry directory is created in relation to the project file. This directory contains copies of all geometry data used. As long as the current project is not saved, the copies of the geometry data are managed in the directory "Own data". The command Save project overwrites the currently open project file with the current changes. In the event that the project was not saved before, the dialog of Save project as opens.
With the Create content file for resource library command, a custom library of objects can be created, containing file types supported by ema (see chapters Mode of operation / File types, User interface / Menu bar / Options / Settings / Storage locations and User interface / Tab "Objects" / Buttons / Insertion of objects / From library / Custom resource library).
The command Cancel closes the ema application. By means of a left click on the symbol ![]() in the frame of the application window, the application is closed as well.
in the frame of the application window, the application is closed as well.